








Supta Vajrasana: Steps, Benefits & Precautions
Table of Contents
- Supta Vajrasana at a Glance
- Understanding Supta Vajrasana
- What does the name mean?
- What Makes It Hard?
- Supta Vajrasana or Supta Virasana?
- Who is this pose for?
- Preparatory Poses for Supta Vajrasana
- How to Perform Supta Vajrasana
- Step 1: Sit in Vajrasana
- Step 2: Set your hands
- Step 3: Lean back to your elbows
- Step 4: Lower the crown of your head
- Step 5: Check three things
- Step 6: Breathe and hold
- Step 7: Come out safely
- Step 8: Rest, then counter-stretch
- Modifications and Variations
- 1. Ardha Supta Vajrasana (half version)
- 2. Elbow-stage version
- 3. Bolster-supported version
- 4. Blanket under the ankles
- 5. Block between the thighs
- 6. Supta Virasana instead
- Health Benefits of Supta Vajrasana (Supta Vajrasana Ke Fayde)
- 1. Deeply stretches the quadriceps and hip flexors
- 2. Supports digestion
- 3. Improves spinal extension
- 4. Opens the chest and rib cage
- 5. Calms the nervous system
- 6. Improves ankle and foot mobility
- 7. Builds patience with your own body
- What Supta Vajrasana does not do
- Supta Vajrasana Precautions: Who Should Avoid This Pose
- Tips for Safe Practice
- 1. Warm up properly
- 2. Use props the right way
- 3. Practise on an empty stomach
- 4. Go one leg at a time first
- 5. Never bounce or push
- 6. Rest and counter-stretch after
- Conclusion
- FAQ
- Can beginners do Supta Vajrasana?
- What is the difference between Supta Vajrasana and Supta Virasana?
- Is Supta Vajrasana safe if I have knee pain?
- How long should I hold Supta Vajrasana?
- How often should I practise it?
- Can I do Supta Vajrasana after eating?
- Does Supta Vajrasana help with weight loss?
- Is Supta Vajrasana safe during pregnancy?
- What should I do after Supta Vajrasana?
- Which muscles does Supta Vajrasana stretch?
Supta Vajrasana or सुप्त वज्रासन — the Reclined Thunderbolt Pose — is the deep, intense extension of the seated Vajrasana. From the kneeling Thunderbolt seat, you recline backward in stages: first onto your elbows, then to the crown of the head, with the spine arching as the chest opens. The result is one of yoga’s deepest stretches for the quadriceps, hip flexors and the entire front of the spine.
It is also an advanced posture, not a beginner’s first backbend. The knees, ankles and lower back all take real load here, so if you have any history of knee injury, ankle pain, disc trouble or sciatica, read the precautions before attempting it. Approached patiently — with a warm-up, props and a gentler half-version along the way — it is safe and deeply rewarding. Rushed, it is one of the easier poses to get hurt in.
This guide covers what the pose actually is, how to prepare for it, how to enter and exit it safely, the modifications that make it accessible, its benefits, and who should avoid it altogether.
Supta Vajrasana at a Glance
| Sanskrit name | सुप्त वज्रासन (Supta Vajrasana) |
| English name | Reclined Thunderbolt Pose |
| Pose type | Kneeling backbend |
| Level | Advanced |
| Main areas worked | Quadriceps, hip flexors, abdomen, chest, spine |
| Hold time | 20–30 seconds for beginners, up to 2 minutes with practice |
| How often | 2–3 times a week |
| Best time | Morning, on an empty stomach |
| Props that help | Bolster, folded blanket, block |
| Gentler options | Ardha Supta Vajrasana, Supta Virasana, elbow-stage version |
Understanding Supta Vajrasana
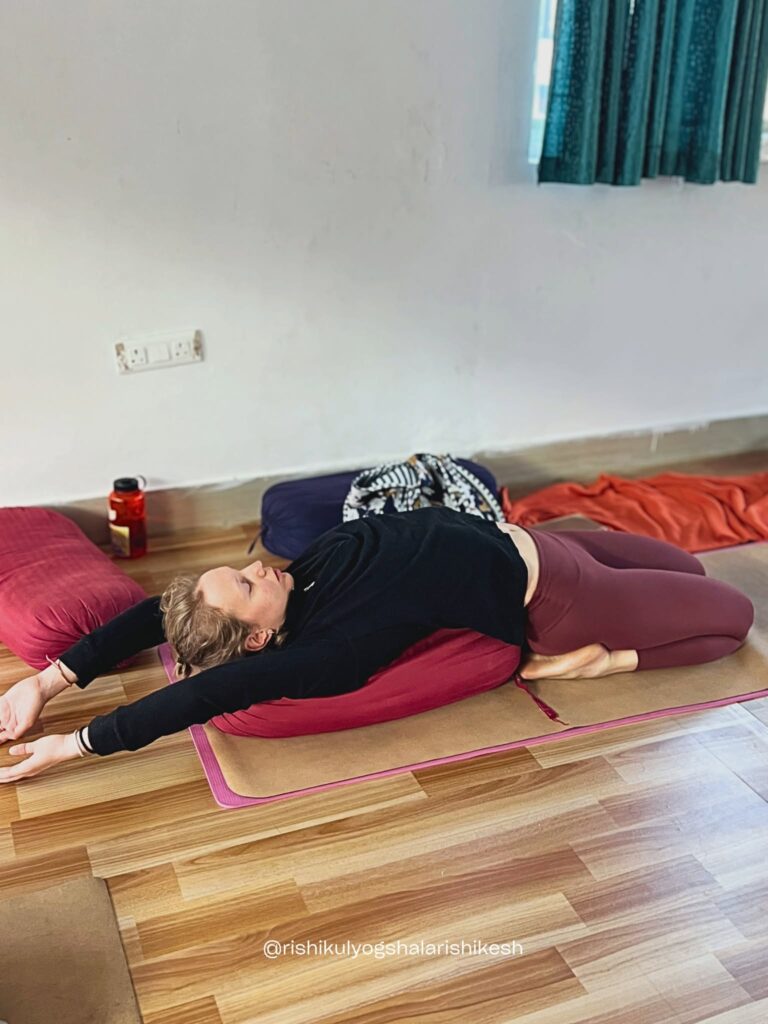
Supta Vajrasana is a kneeling backbend where you sit on your heels and lean back until the crown of your head rests on the floor. The shins stay down, the chest lifts, and the spine forms an arch. It is an advanced pose, and most people need a few months of practice before the full version feels safe.
What does the name mean?
Supta means reclined or sleeping. Vajra means thunderbolt, and also diamond. It is the same word used in Vajrasana, the simple kneeling seat. So the name just says “the reclined thunderbolt seat.”
Old texts link the name to the vajra nadi, an energy channel that runs up the front of the body. That is the line this pose opens.
What Makes It Hard?
Your knees stay fully bent while your thigh muscles stretch across them. Those two things happen at the same time. That is unusual, and it is why the pose asks so much of the knee joint.
Three areas take the load: the knees, the ankles, and the lower back. If any of those three is stiff or sore, the pose will tell you quickly.
In our classes in Rishikesh, this is the pose students most often rush. They can touch their head to the floor on day one, so they assume they are ready. Two weeks later, the knees ache. Being able to do a pose and being ready for it are not the same thing.
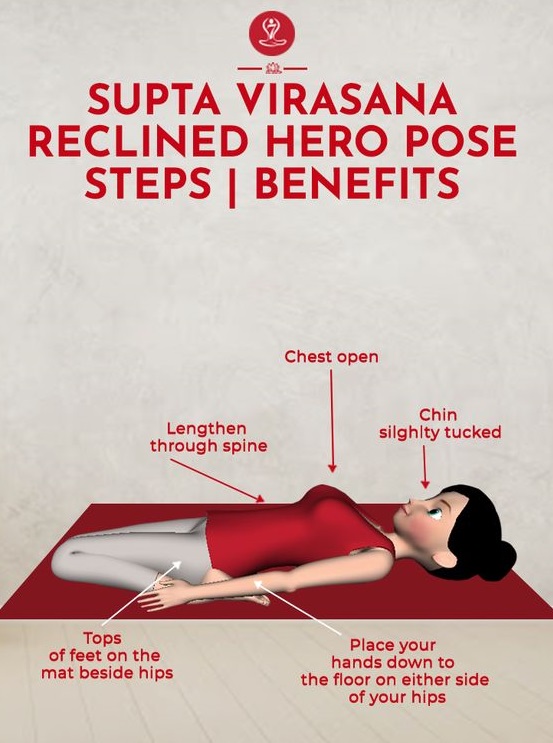
Supta Vajrasana or Supta Virasana?
These two get mixed up all the time, including in photos online. Here is the difference:
| Supta Vajrasana | Supta Virasana | |
|---|---|---|
| Feet position | Buttocks rest on the heels | Feet sit beside the hips |
| Back | Arched, lifted off the floor | Can lie flat on the floor |
| Head | Crown touches the floor | Back of the head rests down |
| Knee load | Heavy | Lighter |
| Common name | Reclined Thunderbolt Pose | Reclining Hero Pose |
Quick rule: if the back is flat on the floor, you are looking at Supta Virasana, not Supta Vajrasana. Most flat-backed pictures labelled “Supta Vajrasana” are actually Virasana.
Supta Virasana is the kinder pose for knees. Many teachers, including us, teach it first and move to Supta Vajrasana later.
Who is this pose for?
It suits practitioners who already sit in Vajrasana comfortably for five minutes, hold Ustrasana without lower-back pinching, and have no knee or ankle injury.
If that is not you yet, that is fine. The half version and prop-supported version give you most of the benefit while your body catches up.
Preparatory Poses for Supta Vajrasana
Nobody arrives at this pose directly. These five build the flexibility and the knee tolerance you need, and most students work through them over several months.
1. Vajrasana (Thunderbolt Pose)
The foundation. Sit on your heels for five minutes without ankle or knee discomfort before you attempt anything reclined.
2. Ustrasana (Camel Pose)
Teaches the same backbend shape while standing on the knees, with far less load on the joints. If Ustrasana pinches your lower back, Supta Vajrasana will pinch it harder.
3. Setu Bandhasana (Bridge Pose)
Opens the hip flexors and warms the spine with the knees comfortable and the back supported by the floor.
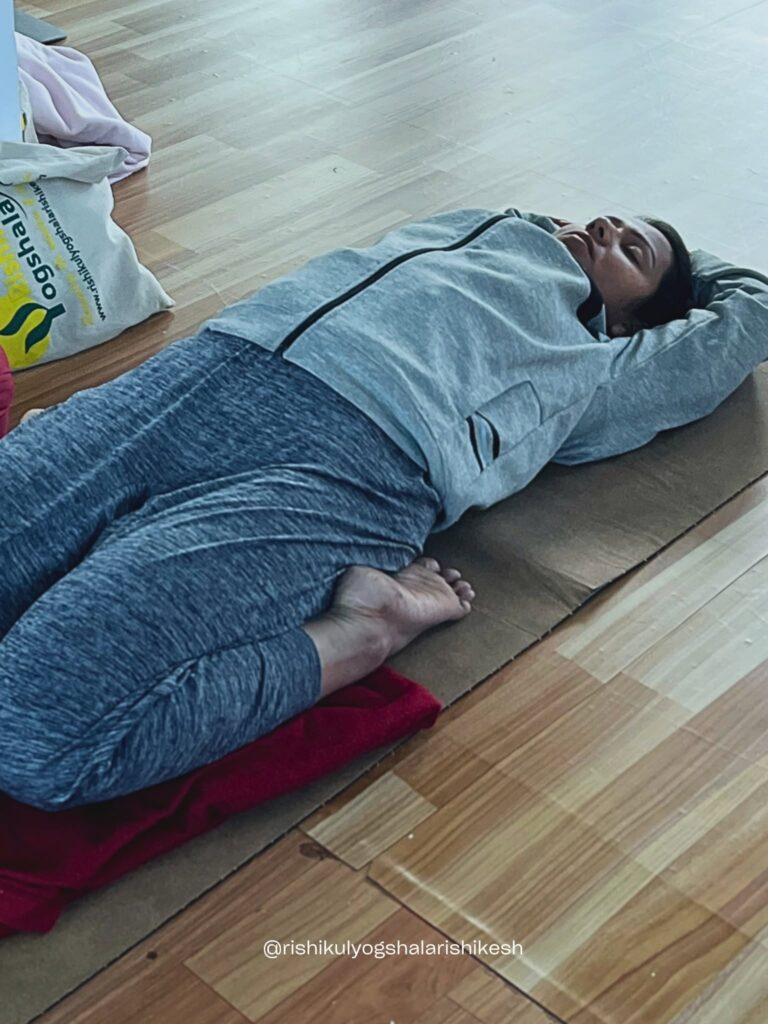
4. Supta Virasana (Reclining Hero Pose)
The closest relative, and much kinder on the knees because the feet sit beside the hips. Practise this until you can rest back comfortably for two minutes.
5. Ardha Supta Vajrasana (Half Reclined Thunderbolt)
The direct stepping stone. One leg folded, one foot flat on the floor.
Work through them in this order. Spending a month at any stage is normal, not slow.
How to Perform Supta Vajrasana
Practice on an empty stomach, at least three hours after a meal. Warm up first with a few rounds of Cat-Cow, Ustrasana and Setu Bandhasana. Cold knees do not belong in this pose.
Step 1: Sit in Vajrasana
Kneel down and sit back on your heels. Knees together. Tops of the feet flat on the floor, toes pointing straight back. Sit here for one minute and breathe.
If your ankles hurt already, roll a thin blanket and place it under them.
Step 2: Set your hands
Place your palms on the floor behind you, beside your hips and close to your feet. Fingers point backwards, towards your toes.
Step 3: Lean back to your elbows
Exhale. Lower yourself onto your forearms, one elbow at a time. Keep your hips heavy on your heels.
This is where most people should stay. Practise only this much for two to four weeks. There is no rush to go further.
Step 4: Lower the crown of your head
Only when step 3 feels easy. Push gently through your elbows, lift your chest, and let the crown of your head slide down to the floor. Your back stays arched. Your neck should feel long, not squashed.
Rest your hands on your thighs, or hold your heels if you can reach them.
Step 5: Check three things
- Hips still on the heels. If they have lifted, come out and try again with less depth.
- Knees still together and still on the floor. If they slide apart, you have gone too far.
- No pinching in the lower back. A stretch across the thighs is right. A sharp point in the spine is not.
Step 6: Breathe and hold
Breathe slowly into your chest. Let your belly stay soft.
Beginners: hold for 20 to 30 seconds. With practice, build to one or two minutes. Never hold through pain.
Step 7: Come out safely
This is the part to take seriously.
- Bring your hands back to the floor beside your hips.
- Press down and come onto one elbow, then the other.
- Lead with your chest. Your head comes up last, not first.
- Return to sitting on your heels.
Do not twist to one side to get up. Do not throw your head forward.
Step 8: Rest, then counter-stretch
Sit quietly in Vajrasana for a few breaths. Then fold into Balasana (Child’s Pose) for one minute to release the lower back, and stretch your legs forward for a few breaths to let the knees rest.
Stop the pose immediately if you feel: sharp knee pain, pinching in the lower back, numbness in the feet, or dizziness.
Modifications and Variations
Most practitioners should be doing one of these rather than the full pose. That is not a lesser practice — it is the correct practice for the body you have today.
1. Ardha Supta Vajrasana (half version)
Fold one leg back into Vajrasana. Keep the other foot flat on the floor with the knee up. Lean back onto your elbows, or all the way down if it stays comfortable.
This halves the load on the knees while giving you nearly the full quadriceps stretch. Hold for 30 seconds, then change sides. Many students practise only this version for six months or more.
2. Elbow-stage version
Stop at the forearms and go no further. This is a complete pose in itself, not an unfinished one. Beginners should treat this as their version of Supta Vajrasana for the first month at minimum.
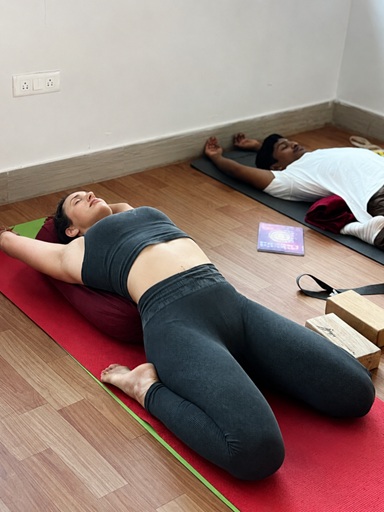
3. Bolster-supported version
Place a bolster lengthways along your spine and recline onto it. Your back is held, so the knees take less strain and you can stay longer and breathe properly.
Start with two bolsters stacked. Remove one when the pose feels easy. This is the most useful modification for stiff hip flexors.
4. Blanket under the ankles
If ankle pain stops you before anything else does, roll a thin blanket and place it under the fronts of your ankles. Small change, big difference.
5. Block between the thighs
If your knees slide apart as you lean back, hold a block or folded blanket between the thighs. It keeps the alignment honest and protects the knee joint.
6. Supta Virasana instead
If the knees simply will not accept sitting on the heels, move the feet beside the hips and practise Supta Virasana. Same benefits for the front of the body, far less knee compression.
Health Benefits of Supta Vajrasana (Supta Vajrasana Ke Fayde)
Supta Vajrasana works mainly on the front of the body, the thighs, hips, belly, and chest. These are areas that stay shortened all day when you sit at a desk or drive. The pose opens all of them at once.
Here is what regular practice does, and what it does not do.
1. Deeply stretches the quadriceps and hip flexors
This is the pose’s strongest effect. Few postures reach the rectus femoris — the thigh muscle that crosses both the hip and the knee — as directly as this one, because the knee is bent and the hip is extended at the same time.
If you sit for long hours, this is the muscle that pulls on your lower back. Opening it often relieves back tightness that stretching the back itself never fixed.
2. Supports digestion
The belly stretches and the abdominal organs get a gentle mechanical pull. Traditional texts recommend Vajrasana and its variations after meals for this reason.
Note that Supta Vajrasana itself should be practised on an empty stomach. The simple seated Vajrasana is the one you sit in after eating.
3. Improves spinal extension
Most daily movement bends us forward. This pose bends the spine the other way, which helps keep the vertebrae mobile and eases the stiffness that builds from long sitting.
The stretch should feel spread across the whole spine. If it concentrates in one spot in your lower back, come out and use a bolster.
4. Opens the chest and rib cage
The front ribs lift and separate. Breathing gets easier because the muscles between the ribs are being stretched rather than squeezed.
Students with rounded, desk-worker shoulders often notice this benefit first.
5. Calms the nervous system
Slow breathing in a supported backbend settles the mind. This is why the pose is often placed near the end of a Hatha class, before the final relaxation.
The calming effect comes from the slow breath and the hold, not from the shape alone. Rushing through it gives you none of this.
6. Improves ankle and foot mobility
The tops of the feet press flat and the ankle joint stretches — an area almost nothing else in daily life reaches, especially if you wear shoes all day.
7. Builds patience with your own body
This is not a pose you can force. Students who try usually end up resting for a week with sore knees. Learning to stay at the elbow stage for a month, and to be satisfied there, is a real skill — and it transfers to every hard pose that comes after.
What Supta Vajrasana does not do
Being honest about this matters more than adding another benefit.
- It is not an inversion. Your head rests level with your hips, not below your heart, so it does not increase blood flow to the brain the way Sirsasana or Sarvangasana does.
- It does not strengthen the knees. It stretches them under load. People with weak or injured knees should build strength elsewhere first.
- It is not a weight-loss pose on its own. No single asana is.
Supta Vajrasana Precautions: Who Should Avoid This Pose
Supta Vajrasana is an advanced posture. It puts real load on the knees, ankles and lower back. Please read this section before you try it.
Do not practise this pose if you have
- A knee injury — torn meniscus, ligament damage, or pain that has not settled
- Knee replacement or recent knee surgery
- Ankle injury or severe ankle stiffness
- A slipped or herniated disc
- Sciatica or nerve pain running down the leg
- Sacroiliac joint pain
- A hernia
- Recent abdominal, hip or spinal surgery
- Severe arthritis in the knees, hips or spine
Practise only with a teacher’s guidance if you have
- High or low blood pressure
- Vertigo or dizziness, because the head moves down and back quickly and the change in head position can trigger symptoms.
- Neck problems, because the crown of the head bears weight
- Osteoporosis
- Pregnancy — this pose is not suitable at any stage; practise gentle Vajrasana instead
Anyone over 60, or anyone returning after a long gap, should stay with Supta Virasana or the elbow-stage version.
Signs to come out immediately
Come out slowly if you feel any of these:
- Sharp or pinpoint pain in a knee
- A pinching feeling in the lower back
- Numbness or tingling in the feet
- Pressure or pain in the neck
- Dizziness or shortness of breath
Mild stretching across the thighs is normal. Sharp, sudden or one-sided pain is not.
Tips for Safe Practice
1. Warm up properly
Never come to this pose cold. Ten minutes is enough: Cat-Cow, a few rounds of Surya Namaskar, Setu Bandhasana, and Ustrasana. The knees and hip flexors need to be warm before they take load.
2. Use props the right way
- Sore ankles: roll a thin blanket and place it under the fronts of your ankles.
- Back won’t lower: place a bolster lengthways behind you and recline onto it. Start with two bolsters stacked and remove one as you progress.
- Knees drift apart: hold a block or a folded blanket between your thighs.
- Neck pressure: stay at the elbow stage. Do not put weight on the head until the elbow version is easy.
3. Practise on an empty stomach
Wait at least three hours after a meal, and four after a heavy one. Early morning is best.
4. Go one leg at a time first
Ardha Supta Vajrasana — the half version, with one leg folded and the other foot flat on the floor — gives you most of the stretch with far less knee load. Many students practise only this version for months. That is a normal, sensible way to train.
5. Never bounce or push
The knee is a hinge, not a ball joint. It does not respond well to force. If you cannot reach a stage today, you will not reach it by pushing harder — you will reach it by practising the earlier stage more often.
6. Rest and counter-stretch after
Balasana for a minute, then stretch the legs out straight. Skipping this leaves the lower back compressed.
Read More – Health Benefits and Importance of Yoga Asanas You Should Know: Backed by Science
Conclusion
Supta Vajrasana rewards patience more than flexibility. Warm up first, lean back only to your elbows and stay there for weeks, and keep your hips resting on your heels — the moment they lift, the stretch leaves your thighs and lands in your lower back. Come out chest first, head last, because that is where most injuries happen. If your knees object, move to Supta Virasana or the half version. Neither is a lesser pose. Choosing the version your body can actually use is what skilled practice looks like.
This is also where a teacher earns their place, since you cannot see your own hips lift and by the time you feel it in your knees it has been happening for a while. That daily correction is what a yoga teacher training in India offers that no article can. At Rishikul Yogshala in Rishikesh, poses like this are taught in stages across the 200 Hour Yoga Teacher Training, with hands-on adjustment in every class. Wherever you practise, begin where your body is today — that is always the right place to begin.
FAQ
Can beginners do Supta Vajrasana?
Not the full pose. Beginners should practise the elbow-stage version or Ardha Supta Vajrasana for at least a few months first. Most people need six months to a year of regular practice before the full version feels safe.
What is the difference between Supta Vajrasana and Supta Virasana?
In Supta Vajrasana the buttocks stay on the heels and the back arches, with the crown of the head on the floor. In Supta Virasana the feet sit beside the hips, the sitting bones drop between them, and the back can lie flat. Supta Virasana is easier on the knees. If the back is flat on the floor, it is Virasana.
Is Supta Vajrasana safe if I have knee pain?
No. Avoid it if you have a knee injury, a meniscus tear, ligament damage, arthritis, or unexplained knee pain. The pose compresses the knee joint while stretching the muscles across it. Work with Supta Virasana or a supported quad stretch instead, and see a doctor about the pain.
How long should I hold Supta Vajrasana?
Beginners: 20 to 30 seconds. With regular practice, build up to one or two minutes. Never hold through pain, and never extend the hold just to reach a number.
How often should I practise it?
Two or three times a week is enough. This pose asks a lot of the knees, so daily practice of the full version is not recommended. The gentler variations can be done more often.
Can I do Supta Vajrasana after eating?
No. Practise on an empty stomach, at least three hours after a meal. The simple seated Vajrasana is the pose traditionally done after eating — not this one.
Does Supta Vajrasana help with weight loss?
Not on its own. It improves flexibility, digestion and posture, but no single asana produces weight loss. That comes from a consistent full practice combined with diet.
Is Supta Vajrasana safe during pregnancy?
No. Avoid it at every stage of pregnancy. The deep backbend and abdominal stretch are not appropriate. Gentle seated Vajrasana, with a cushion if needed, is a safer alternative.
What should I do after Supta Vajrasana?
Sit in Vajrasana for a few breaths, then fold into Balasana (Child’s Pose) for one minute, then stretch the legs out straight. Skipping the counter-stretch leaves the lower back compressed.
Which muscles does Supta Vajrasana stretch?
Mainly the quadriceps — especially the rectus femoris, which crosses both the hip and the knee — along with the hip flexors, the abdominals, the intercostal muscles between the ribs, and the front of the ankles.
This article is for general information and is not medical advice. If you have a respiratory or heart condition, are pregnant, or are unsure whether these practices suit you, please speak to your doctor before beginning.

 +91-8433225327,
 Rishikul Yogshala Rishikesh, Narayan Kunj, Jonk Village, Ram Jhula, Swarg Ashram, Rishikesh, Uttarakhand 249304
 By Airway
 By Railway
 By Bus/Cabs