")
What is Tadasana (Mountain Pose)?
Tadasana is one of the most important poses in yoga. From the outside, it looks like you are just standing. But anyone who has been taught this pose properly knows there is a lot more happening inside the body than it appears.
The name comes from Sanskrit. “Tada” means mountain. “Asana” means pose. So Tadasana is the mountain pose; you stand tall, steady, and grounded, like a mountain. It is also known as Samasthiti in Ashtanga yoga, which means “equal standing.”
In most yoga classes, Tadasana is where everything begins. It is the starting point of Sun Salutations, the foundation of all standing poses, and a resting position you return to between poses to check in with your body.
Bipin Baloni, who has taught yoga in Rishikesh for over 16 years, explains it this way:
“When I teach Tadasana, I tell students, this is not a break between poses. This is where you find out how well you know your own body. Every imbalance, every tension, every habit your body has built over the years, all show up in Tadasana. That is why we begin here.”
It may look simple. But practiced with full awareness, Tadasana pose is one of the most powerful poses in the entire practice.

Every major standing pose in yoga, Warrior I, Triangle asana, Tree Pose, begins and returns to Tadasana. It is the physical and mental reset point within a practice. More than that, it teaches you something deeply practical: how to stand in your own body correctly. In a world where most people spend hours hunched over a screen, that is not a small thing.
So what does Tadasana actually do? It improves posture by bringing the shoulders, hips, and ankles into a single vertical line. It activates the core and the arches of the feet. It counteracts the collapse that prolonged sitting creates. And according to classical yoga texts, it cultivates sthiram, steadiness, in both the body and the mind.
Whether you are stepping onto the mat for the first time or revisiting the basics after years of practice, understanding Tadasana properly will change how you move through every other posture. This guide walks you through exactly how to do it, what to watch for, and why getting it right matters more than most people realise.
To learn more about the Tadasana yoga pose and other yoga poses, we’d recommend enrolling in our 200 hours yoga teacher training program, where we teach the technicalities of the asanas and also provide a yoga teacher certificate at the end of the program.
Before that, let’s dive into some of the benefits of the tadasana pose.

Benefits of Tadasana (Mountain Pose Benefits)
Let’s discuss tadasana benefits in detail.
1. Improve Posture
This is the most direct and well-known benefit. Tadasana trains the body to stand in its natural alignment, neutral spine, open chest, relaxed shoulders. Regular practice builds postural memory, so your body begins to hold itself correctly even when you are not thinking about it.
2. Strengthens The Feet and Arches
Most people never pay attention to how they stand. Tadasana yoga pose brings awareness to the feet, strengthens the arches, and corrects common issues like flat feet, pronation, and supination. Strong feet create a strong foundation for the whole body.
3. Tones the Legs and Core
When practiced with correct engagement, Tadasana gently activates the quadriceps, hamstrings, calves, and deep core muscles. Over time, this builds quiet but real strength throughout the lower body and abdomen.
4. Counters the Effects of Sitting
If you spend long hours sitting at a desk, your hips tighten, your spine rounds, and your shoulders creep forward. Tadasana pose directly reverses all of this. It opens the chest, lengthens the spine, and brings the shoulders back to where they belong.
5. Build Body Awareness
Tadasana pose teaches you to feel your body from the inside. You learn to notice where you are holding tension, where your weight is shifting, and how your posture affects your breathing and your mood. This is called proprioception — and it is a skill that carries over into everything you do.
6. Open the Chest and Improve Breathing
When the chest is open and the shoulders are back, the lungs have more room to expand. Practicing Tadasana regularly can improve your breathing capacity and make your breath more efficient.
7. Calms The Mind
Standing still with awareness is a form of meditation in itself. Tadasana yoga slows the nervous system, reduces scattered mental energy, and brings you into the present moment. Many students report that even 60 seconds in Tadasana pose can shift their mental state noticeably.
8. Reduces Back Pain
By teaching the spine to find its natural neutral curve, Tadasana yoga relieves the compression and imbalance that causes many common forms of lower back pain. It is especially helpful for people who hunch forward or overarch their lower back.
9. Helpful For Flat Feet
The active engagement of the feet in Tadasana, spreading the toes, lifting the arches, and grounding through all four corners, gradually strengthens the muscles that support the foot arch, which is beneficial for those with flat feet.
10. Safe and Beneficial for Special Populations
Tadasana yoga pose is gentle enough to be practiced by seniors, children, pregnant women (with a wider stance), and people managing conditions like Parkinson’s disease, COPD, and postural hypotension. It is one of the few poses that is almost universally accessible.
11. Foundation for All Standing Poses
This may be the most important benefit of all. Every standing pose in yoga, from Warrior to Triangle to Tree, is built on the alignment principles of Tadasana. A student who understands Tadasana deeply will progress in all standing poses much faster.
: Steps, Benefits & Teaching Tips 2")
How To Do Mountain Pose Tadasana?
Step 1
Stand on your mat with your feet either together (big toes touching, heels slightly apart) or hip-width apart if you need more stability. Both are correct — choose what works for your body.
Step 2
Spread your toes wide on the mat. Lift all ten toes, fan them open, and then gently place them back down. Feel all four corners of each foot — big toe mound, little toe mound, inner heel, outer heel, pressing evenly into the ground.
Step 3
Engage your thigh muscles by gently lifting your kneecaps. Do not lock your knees. Keep a very slight, micro-bend so the joints stay soft.
Step 4
Tuck neither your tailbone under nor let your lower back over-arch. Find the middle, a neutral pelvis. Your lower back should maintain its natural, gentle curve.
Step 5
Gently engage your core — not a hard grip, just a light drawing in of the lower belly. This supports the spine from the front.
Step 6
Inhale and lengthen the spine upward. Feel the crown of your head lifting toward the ceiling as if a thread is pulling it up. At the same time, feel your feet pressing down into the earth.
Step 7
Roll your shoulders up, back, and then down. Draw your shoulder blades gently toward each other and away from your ears. Let your chest open naturally — do not force it or puff it out.
Step 8
Let your arms hang naturally at your sides with your palms facing forward. This internal rotation of the shoulders opens the chest and is one of the small details that make a big difference in this pose.
Step 9
Keep your chin parallel to the floor. Relax your jaw, your throat, and your tongue. Let your gaze rest softly on a fixed point in front of you.
Step 10
Breathe normally. Hold the pose for 30 seconds to 1 minute while staying aware of everything from your feet to the crown of your head.
Breathing in Tadasana
Breathing is not separate from Tadasana; it is part of the pose itself.
- As you inhale, feel the breath lifting and lengthening your spine. The ribcage expands in all directions: front, sides, and back. The chest opens slightly more. The crown of the head rises.
- As you exhale, feel the body settle and ground. The feet press a little more firmly into the earth. The shoulders release a little further down. Any tension in the face or throat softens.
- This rhythm, inhale to lengthen, exhale to ground, is the breath of the Tadasana yoga pose. When you breathe this way, the pose becomes alive. It is no longer passive standing. It becomes an active, meditative experience.
Bipin Baloni often tells students, “In Tadasana, the breath is doing as much work as the muscles. When you lose your breath, you have lost the pose, even if your alignment looks perfect from the outside.”
Try to breathe naturally through the nose. Do not hold your breath or force it. Let the breath move freely for the entire duration you are in the pose.
What to do If You Are a Beginner?
- The first thing to keep in mind is your stance, which is extremely important.
- Next is balance. You have to position your feet as they are when you walk, but leave them a few inches apart.
- Keep your knees in front and keep your core slightly strong to maintain the pose’s integrity. However, to maintain strength, don’t lock your joints.
- Open up your shoulders and then your chest, but don’t tighten up your shoulders and keep them away from your ears.
- Ask a friend or a partner to check the alignment of your shoulder, ear, outer ankle, and outer hip.
- Lengthen your neck and see a fixed spot in front of you. Inhale and exhale normally.
Also Read: Pranamasana Yoga Pose (Prayer Pose): Step-by-Step Instructions, Variations & Benefits

Alignment Cues and Common Mistakes
Common Mistake 1 — Tucking the Tailbone Too Much
Many students tuck their tailbone under in an effort to “straighten” the lower back. This actually flattens the natural lumbar curve and creates compression. Instead, find a neutral pelvis where the lower back maintains a gentle inward curve.
Common Mistake 2 — Locking the Knees
Locked knees look straight but create joint compression and block the flow of energy up through the legs. Always keep a micro-bend. Your knees should feel soft and alive, not rigid.
Common Mistake 3 — Shoulders Creeping Up
Tension in the neck and shoulders causes them to lift toward the ears. Consciously draw your shoulders down and back. If you notice them rising, take a deep breath in, then exhale and drop them deliberately.
Common Mistake 4 — Weight Shifting to the Heels
Many people unconsciously lean back onto their heels. This throws the whole body out of alignment. Make sure your weight is evenly distributed across all four corners of both feet.
Common Mistake 5 — Holding Tension in the Face
The jaw, tongue, and throat often tighten without us realising. Relax the muscles of your face. Soften your eyes. This relaxation signals the nervous system to calm down and allows the pose to work more deeply.
Common Mistake 6 — Letting the Chin Drop or Lift
The head should be balanced directly over the spine with the chin parallel to the floor. A dropped chin rounds the upper back. A lifted chin creates tension in the neck. Find the neutral middle.
Tips for Mountain Yoga Pose
- If you are new to Tadasana yoga, here are some things that will help you get it right from the beginning.
- Start with feet hip-width apart. Feet together is the classical position, but hip-width gives more stability when you are still learning to balance and align.
- Stand against a wall. This is one of the most useful tools for beginners. Stand with your heels, buttocks, and shoulder blades lightly touching the wall. Your lower back will have a small gap from the wall, which is your natural lumbar curve. Use this wall feedback to understand what correct alignment feels like.
- Use a mirror. In the early stages, seeing your alignment from the outside can help you correct habits you cannot feel yet.
- Ask a teacher or friend to watch. Have someone check that your ears are directly over your shoulders, your shoulders over your hips, your hips over your knees, and your knees over your ankles. This plumb-line alignment is what you are aiming for.
- Do not rush. Beginners often want to move quickly to more exciting poses. But the time spent developing a real Tadasana yoga is never wasted. Every standing pose you do later will benefit from this foundation.
Mountain Yoga Pose Tips for Teachers
If you are a yoga teacher, here is how to guide your students into a better Tadasana pose.
Cuing the Feet
Ask students to lift all their toes, spread them wide, and place them back down one by one. Then ask them to find all four corners of each foot. This simple exercise wakes up the feet and immediately improves the stability of the whole pose.
Cuing the Legs
Say “lift your kneecaps” rather than “engage your quads.” It gives students a clearer action. Then add “but keep a micro-bend — don’t lock the joint.” This two-part cue avoids the common mistake of hyperextension.
Cuing the Core
Avoid “suck in your belly.” Instead, say “gently draw your lower belly in and up.” This activates the deep core (transverse abdominis) rather than the superficial muscles, which gives better spinal support.
Cuing the Shoulders
“Roll your shoulders up, back, and down” is a clear and effective movement sequence. Follow it with “let your palms face forward” — this small external rotation of the arms naturally opens the chest without any forcing.
Cuing the Head
“Lengthen the back of your neck” is more useful than “lift your chin.” It encourages the natural upward extension of the cervical spine without creating tension in the front of the throat.
Using Touch
A gentle downward press on the tops of the shoulders, or a light two-fingered lift under the sternum, can help students feel the correct direction of these two actions simultaneously.
Returning to the Tasasana Between Poses
Train your students not to treat Tadasana yoga pose as a passive rest. When they return to it between standing poses, remind them to reset all the alignment points actively. This makes the whole practice more conscious and builds muscle memory faster.
Mountain Pose Variations
Variation 1 – Feet Hip-Width Apart (Modified Tadasana)
This is the most accessible version. Instead of feet together, stand with feet hip-width apart. Everything else remains the same. This gives a wider base of support and is recommended for beginners, pregnant women, and those with balance challenges.
Variation 2 – Tadasana Against a Wall
Stand with your back against a wall. Let your heels, buttocks, and shoulder blades make light contact with the wall. Your lower back will naturally be a few centimetres away. Use this feedback to self-correct your alignment without needing a teacher or mirror.
Variation 3 – Tadasana in a Chair (Seated Mountain Pose)
Sit toward the front edge of a chair with your feet flat on the floor directly under your knees. Sit tall with a neutral spine. Draw your shoulder blades back and down. This version is excellent for seniors, office workers, and anyone dealing with lower-body injury.
Variation 4 – Urdhva Hastasana (Arms Raised Mountain Pose)
From Tadasana, inhale and sweep both arms overhead, palms facing each other or touching. Keep the shoulders away from the ears. This is the version used in Sun Salutations. It deepens the lengthening of the spine and adds a gentle backbend.
Variation 5 – Samasthiti (Equal Standing)
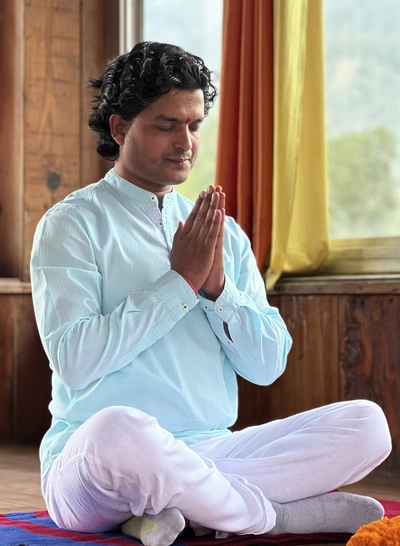
This is the Ashtanga version of Tadasana yoga. The hands are brought to the heart center (Anjali Mudra) rather than hanging at the sides. It adds a meditative quality and is used as the starting and ending position in Ashtanga sequences.
Variation 6 – Tadasana on Tiptoes
From Tadasana pose, slowly rise onto the balls of your feet and hold for several breaths. This challenges balance, strengthens the calves and ankles, and builds concentration. Come down slowly with control.
Variation 7 – Tadasana with Yoga Block
Place a yoga block between your inner thighs (just above the knees). Gently squeeze the block. This cue helps students feel how to engage the inner thighs, find a neutral pelvis, and activate the pelvic floor — three things that are difficult to teach through verbal instruction alone.
Also Read: Sirsasana (Headstand Pose) Guide: Benefits, Steps, Variations, and Precautions

Tadasanan In a Yoga Sequence
Understanding where Tadasana fits in a sequence helps you use it more intelligently.
1. Poses That Prepare for Tadasana
- Dandasana (Staff Pose) — teaches spinal length and active posture in a seated position, which translates directly into standing.
- Baddha Konasana (Bound Angle Pose) — opens the hips so the pelvis can find neutral more easily in standing.
- Simple ankle rolls and foot exercises — wake up the intrinsic foot muscles before asking them to work in Tadasana yoga.
2. Poses That Flow from Tadasana
- Uttanasana (Standing Forward Fold) — a direct transition from Tadasana yoga, flowing forward on an exhale.
- Utkatasana (Chair Pose) — begins in Tadasana and moves into a deep bend at the knees and hips.
- Vrikshasana (Tree Pose) — all the alignment principles of Tadasana carry directly into this balance.
- Virabhadrasana I (Warrior I) — the foot, leg, and core engagement of Tadasana is the foundation of all Warrior poses.
- Trikonasana (Triangle Pose) — the open chest and active legs of Tadasana are the basis of this lateral stretch.
3. Tadasana in Sun Salutation
- Tadasana is the starting and ending position of Surya Namaskar. In Ashtanga, it is called Samasthiti here. Each time you return to it between sun salutation rounds, you have an opportunity to reset, check your alignment, and move consciously into the next round.
4. Using Tadasana as a Barometer
- Throughout any standing practice, return to Tadasana between poses and use it as a moment of assessment. How does your body feel? Is one side different from the other? Is your breath easy or strained? This honest feedback helps you practice more wisely.
Who Should Be Careful with Tadasana — Precautions
Tadasana pose is one of the safest poses in yoga. However, there are a few situations where modifications or extra care are needed.
1. Headaches and Migraines
If you have a headache or active migraine, avoid prolonged standing. The upright position can sometimes increase pressure and discomfort. Rest in a supported reclined position instead.
2. Vertigo and Dizziness
If you experience dizziness or vertigo, practice with your feet wider than hip-width apart and keep your gaze fixed firmly on one point at eye level. Keep one hand resting lightly on a wall or chair. Do not close your eyes in the pose.
3. Low Or High Blood Pressure
People with low blood pressure should avoid standing still for too long, as it can cause lightheadedness. Move in and out of the pose gently. Those with high blood pressure should avoid raising the arms overhead (Urdhva Hastasana variation) for extended periods.
4. Recent Leg, Ankle, Or Foot Injury
If you are recovering from a fracture, sprain, or surgery in the lower body, consult your doctor before practicing. A seated version of Tadasana (chair pose) may be more appropriate during recovery.
5. Pregnancy
Tadasana pose is generally safe throughout pregnancy. Use a wider stance (feet hip-width or slightly wider) for stability, especially in the second and third trimesters. Avoid standing for very long periods without movement.
6. Flat FeetThe
Tadasana pose is actually beneficial for flat feet when practiced carefully. Focus on spreading the toes and gently lifting the inner arches. Do not force the arch up — just engage the muscles that support it over time.
Concluding Thoughts
Tadasana proves that the simplest things in yoga are often the most powerful. Standing tall, breathing fully, and feeling completely grounded, it sounds easy, but most of us have to consciously relearn it.
Use this pose as your reset button during practice. It will honestly tell you whether your body is ready to move forward or needs to slow down. That kind of body awareness is something you carry with you long after you step off the mat.
Does Tadasana increase height? Not directly, but it absolutely helps you stand at your full natural height by correcting posture and spinal compression. Most people look and feel taller within a few weeks of consistent practice.
Practise for just 5 to 10 minutes daily, stay consistent, and combine it with a healthy lifestyle. The results will follow.
The mountain does not rush. Neither should you.
Mountain Pose FAQs
Q1. What is Tadasana?
Ans: Tadasana, or Mountain Pose, is a foundational standing posture in yoga where you align your body from feet to crown, building stability, posture, and breath awareness. It is the starting point for all standing poses.
Q2. Why is it called Mountain Pose?
Ans: The Mountain pose is called Tadasana or Samasthiti in Sanskrit. Tada means mountain, and Asana means pose. So, you are standing tall like a mountain in Tadasana.
Q3. How do you describe Mountain Pose?
Ans: It is a simple standing pose with your feet together and your body vertically upright and strong. Here, your shoulder blades are pulled backward and away from your ears, and your knees are softened. Also, it is a starting pose for all other standing poses in yoga and is the most basic posture.
Q4. Who should not do Mountain Pose?
Ans: People with migraine, vertigo, and low or high blood pressure should not do the Mountain pose. These ailments can cause dizziness, and this pose can bring more pain or discomfort.
Q5. Does Tadasana increase height?
Ans: Not directly. It cannot change your bone structure. But it does help you stand at your full natural height by correcting rounded shoulders, compressed spine, and collapsed arches — which many people carry without realising.
Q6. What are the most common mistakes in Tadasana?
Ans: Three: locking the knees, tucking the tailbone under, and shoulders creeping toward the ears. If you are holding your breath or bracing anywhere, you have moved from the pose into its imitation.
Q7. Can beginners start with Tadasana?
Ans: It is one of the best places to start. No flexibility or strength required. The body awareness you build here carries into every other posture you will ever learn — it is never too basic to practise well.
Q8. Can Tadasana help with back pain?
Ans: Yes, carefully. It teaches the spine its neutral position and reduces muscular imbalances from poor posture. However, work with a qualified teacher if pain is significant — small alignment errors can make things worse, not better.
Q9. What is the best time to do Tadasana?
Ans: Tadasana can be practiced at any time of day. Many people include it in their morning routine as a way to set the body’s alignment for the day. It is also very useful at the end of a workday to counteract hours of sitting. Avoid practicing immediately after a very large meal.
Q10. Is the Mountain pose good for children?
Yes. Tadasana is excellent for children, especially those who are developing their posture habits. It teaches children body awareness and the habit of standing with attention. It is simple, safe, and can be made fun by asking children to stand “as tall and strong as a mountain.