








Lotus Pose Anatomy: A Gentle Guide to What Happens in the Body When You Sit in Padmasana
Table of Contents
- Lotus Pose Anatomy: What Happens Inside the Body
- Hip Joint in Lotus
- Knee Joint in Lotus
- Ankles in Lotus
- Key Muscles Involved in Lotus Pose
- Muscles that Stretch
- Muscles that Work or Support
- Role of the Knees and Ankles
- Benefits of Practising Lotus Pose
- Physical Benefits
- Mental and Emotional Benefits
- Energetic Benefits
- Common Challenges and How to Overcome Them
- Tips for Safe Practice
- Lotus Pose Beyond the Mat
- Final Thoughts
Lotus Pose — Padmasana — looks like stillness. The hands rest, the back is long, the breath quiets. But inside the body, much is happening. The hips rotate externally to a degree most modern bodies haven’t been trained for. The knees flex and the ankles hold a specific articulation. Specific muscles stretch; others quietly work to support. In this guide, we’ll meet the anatomy of Lotus Pose gently — the joints involved, the muscles that stretch, the muscles that support, and why Padmasana is genuinely an anatomically demanding pose despite its meditative appearance.
For however peaceful the Lotus might appear from the outside, anyone who’s tried it will tell you it can be pretty demanding. It calls for open hips, soft knees and a stable core. This is where lotus pose anatomy is valuable. When we can read what is happening inside the body as we take the pose, what muscles are being asked to flex, what muscles can help support those, and what areas of the body require special attention, we can practice Lotus pose more safely and easily.
Lotus Pose Anatomy: What Happens Inside the Body
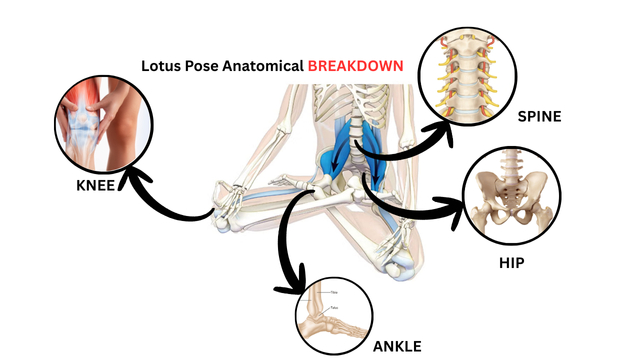
Now it’s time to explore the yoga anatomy of Padmasana. Several joints and muscle groups are engaged when you sit in the Padmasana. Hip external rotations, knee flexion and ankle dorsiflexion. All these movements require certain muscles to provide support and flexibility.
Hip Joint in Lotus
The hips are the key players. To get the feet in Lotus, you have to turn out the hips. This action is called hip external rotation. If there’s not enough room in the hip, the pressure transfers into the knee, which is why many yoga teachers advocate for flexible hips before going into full Lotus.
Knee Joint in Lotus
In this position, the knees are bent deeply. But the knee is not really built for a lot of rotation; it almost exclusively bends and straightens. If the hips are not open enough, the pressure moves into the knees, and that can be dangerous. Thus, the preservation of the knees is one of the major focuses in this pose.
Ankles in Lotus
The ankles also have a key, if underappreciated, role. They ought to flex enough so that the soles of the feet can rest upward onto the thighs. When ankle mobility is limited, the pose may feel sharp or uncomfortable.
Key Muscles Involved in Lotus Pose
Understanding which muscles are stretched and which ones are strengthened in Lotus Pose can make a big difference in your practice.
Muscles that Stretch
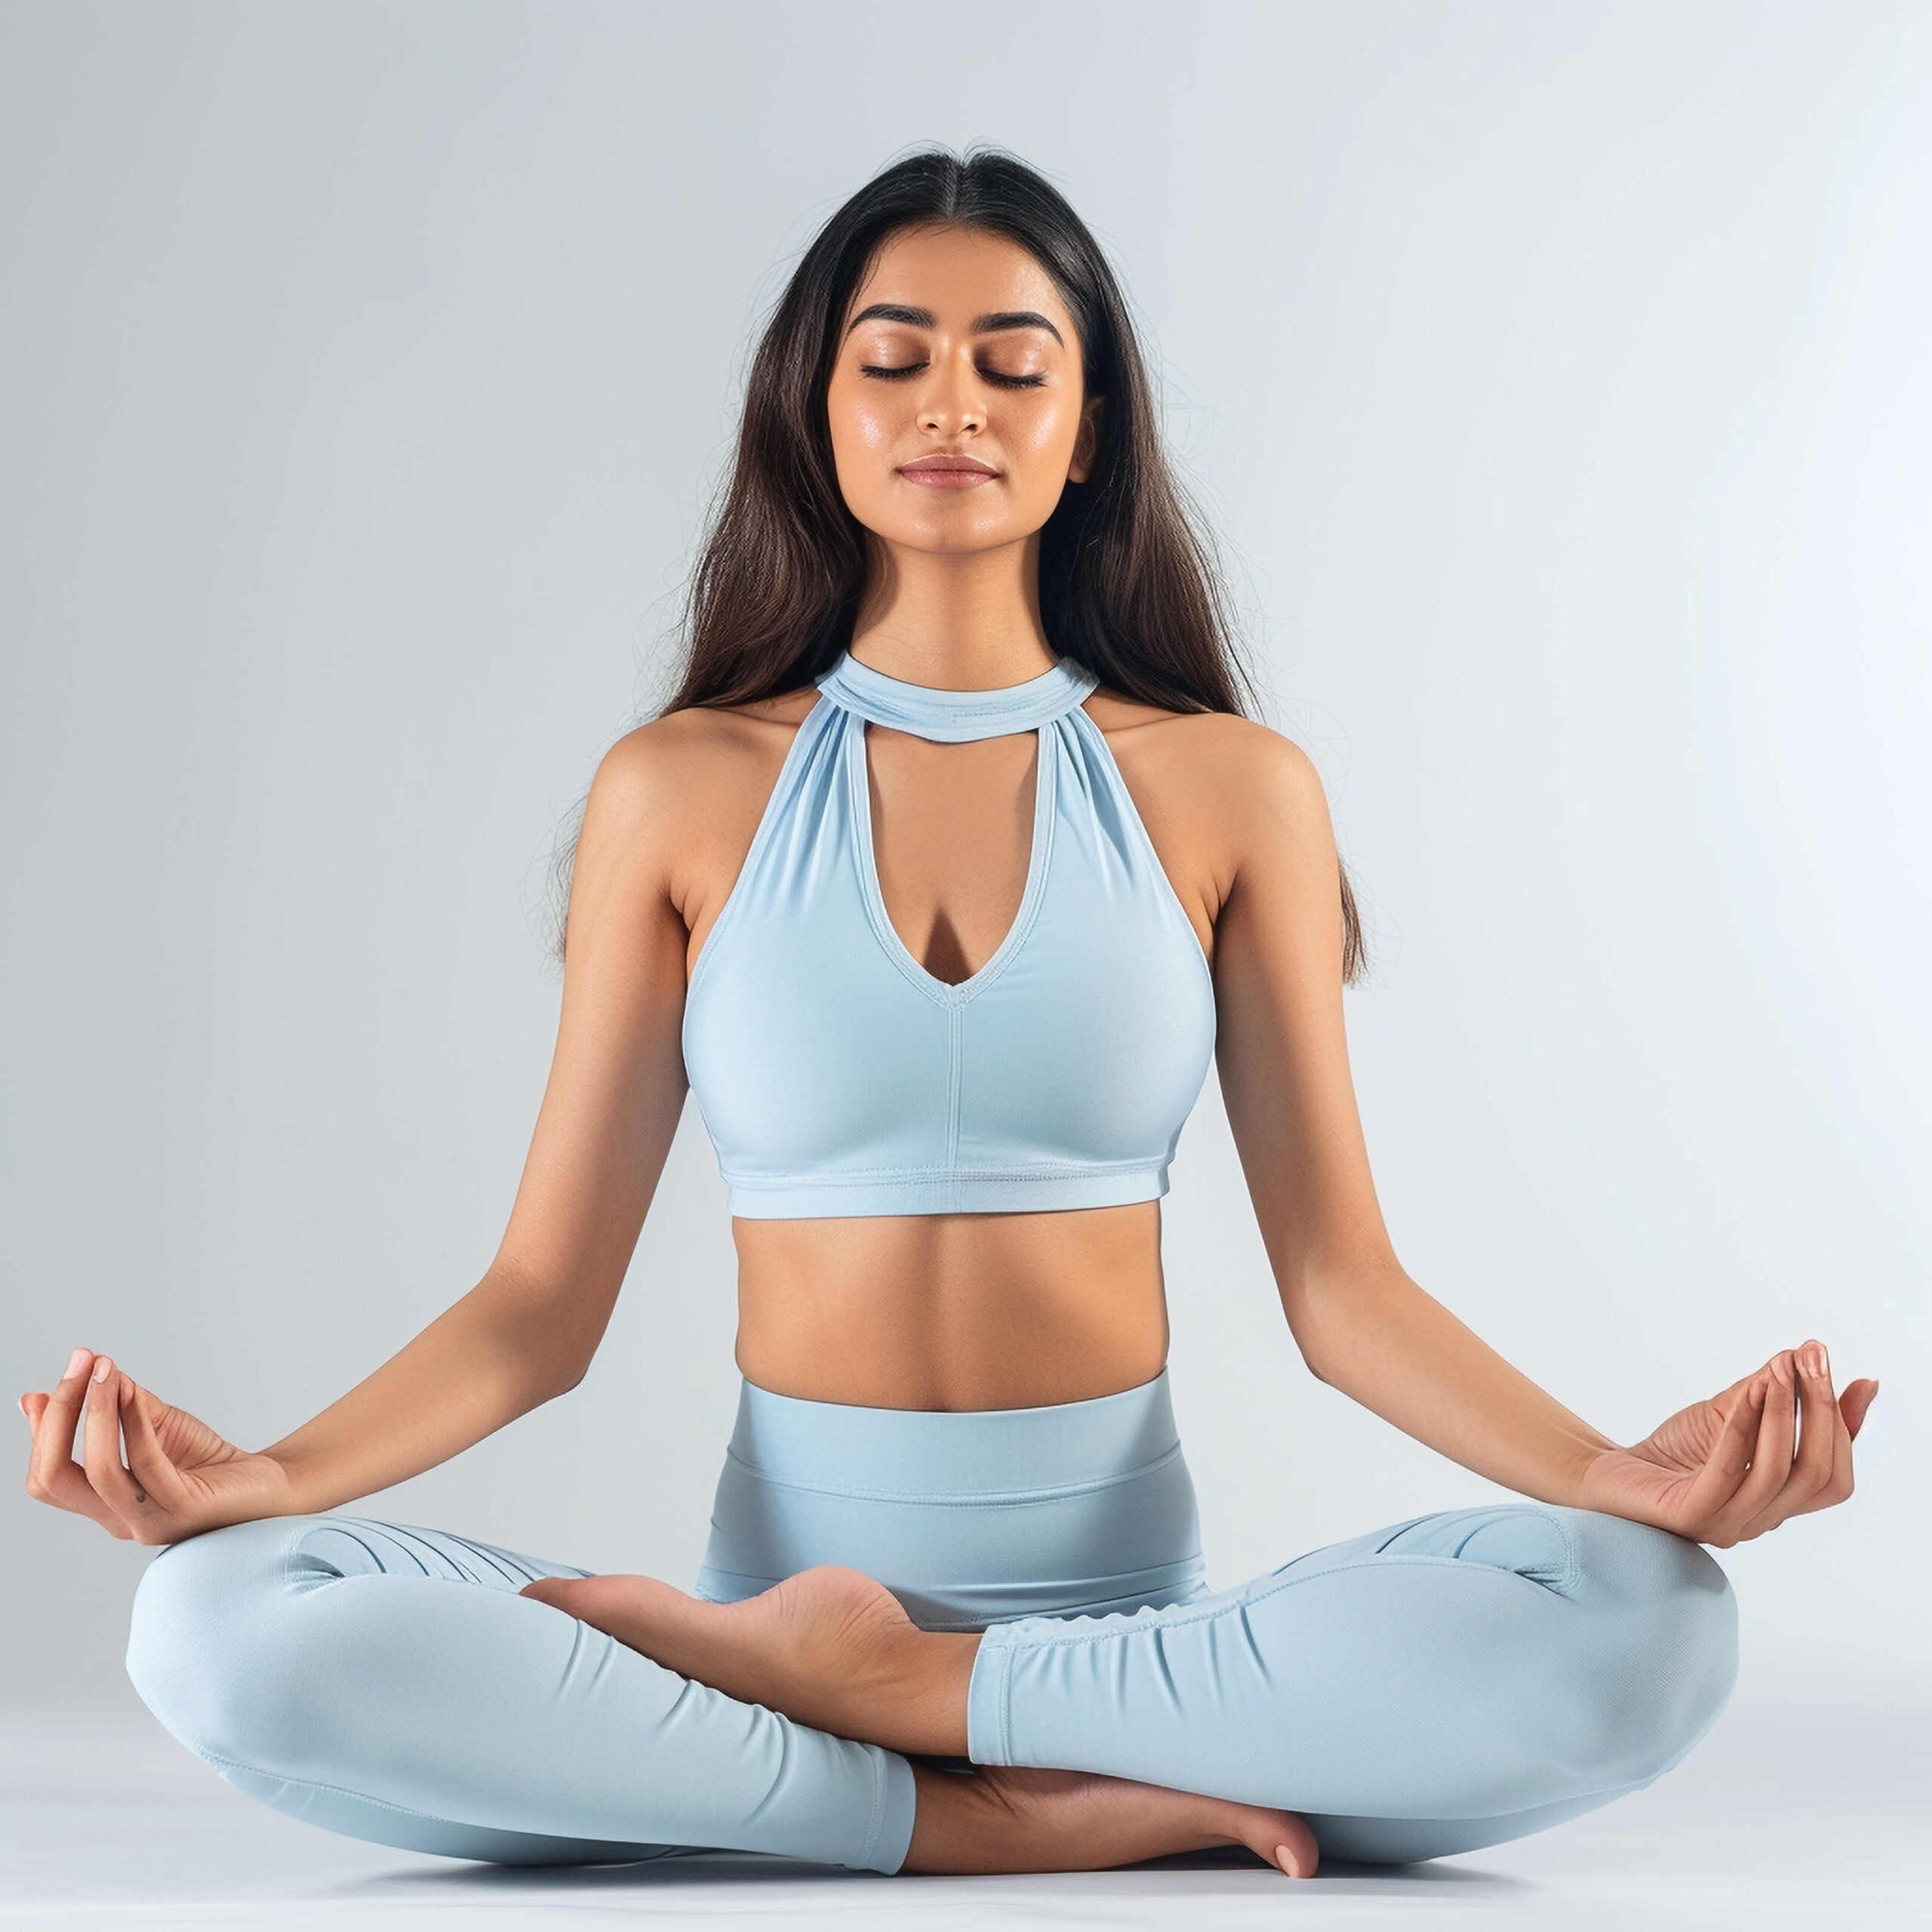
Hip External Rotators (Deep Six Muscles): Piriformis, gemelli, obturators, etc. They help permit the thigh to rotate out and must also elongate to give space.
Adductors (Muscles of the inner thigh): These muscles stretch as the legs are spread out.
Gluteus Maximus (Partially): Although it aids in external rotation, not all parts of this large muscle stretch in the pose.
Muscles that Work or Support
Hip Flexors: They are responsible for stabilising the thigh and keeping the legs in proximity to the body.
Erector Spinae (Back Muscles): Spinal muscles, Erector Spinae refers to the muscles surrounding the spine, which help keep your body in an upright position.
Core Muscles (Abs, Obliques): To stabilise the spine and maintain balance.
Quads: When bent, the muscles on the front of your thigh are still slightly engaged to ensure support for the knees.
Role of the Knees and Ankles
These are not prime movers, but these exercises put a soft stress on the ligaments and structures around the knee and ankle. Proper alignment is crucial here. So these could be overloaded if the hips aren’t prepared. That’s why Lotus Pose is typically an advanced posture.
Benefits of Practising Lotus Pose
Some may find Lotus Pose tough to master, but it has many physical, mental and energy benefits. It’s precisely for that reason that it has remained throughout centuries as one of the staple poses in yoga.
Physical Benefits
Improves Hip Flexibility
With consistent practice and attention, Lotus Pose helps to open up the hips — the muscles tend to become tight from sitting in chairs for hours on end.
Strengthens the Spine
The Lotus’ vertical seating position promotes proper spinal alignment. Over time, it helps to strengthen the back and prevent slouching.
Supports Joint Health
The mild stress that’s laid on the hips, knees, and ankles (as long as it’s performed properly) is one way to keep them mobile and strong.
Encourages Better Breathing
An upright spine and an open chest promote more full lung expansion, so the breath has rhythm, depth and calm.
Also Read: Lotus Pose (Padmasana): What is a Lotus Pose and The Health Benefits That Comes With It?
Mental and Emotional Benefits
Lotus is not just physical—it’s mental. Restless thoughts are calmed when seated in this solid seat. The posture does naturally lead the body into quietness, which is why it’s perfect for meditation. Most of us will agree that even a few moments in Lotus can clear away the mental muck.
Energetic Benefits
The Lotus position is known in yogic philosophy due to its alignment of the energy centres (chakras) of the body. When the spine is straight, the energy can generate and rise up freely from the root to the top. This stream contributes to a focus, self-awareness, and inner growth.
Common Challenges and How to Overcome Them
Lotus can seem out of reach for a lot of beginners. A stiff hip, tight knee or weak core muscles can also create discomfort. The key is patience. Compelling the posture may do more harm to the knees than good.

Rather, they say, new practices should be built incrementally:
- Get hip openers such as Bound Angle Pose (Baddha Konasana), Pigeon Pose (Eka Pada Rajakapotasana) or Garland Pose (Malasana) into your practice.
- Direct focus on core and back muscles with easy seated poses.
- If your knees protest, take Half Lotus Pose, Ardha Padmasana, or just cross the legs.
With time, these preparations create flexibility and help the full Lotus be a safer and less challenging pose.
Tips for Safe Practice
While Lotus has many benefits, safety must come first. Remember these key points:
- Never force the knees. If you feel pain there, come out immediately.
- Warm up the hips before attempting the posture.
- Support yourself with a folded blanket or cushion under the hips to reduce strain.
- Practice regularly but with patience. Progress in yoga comes with time, not with pushing.
Lotus Pose Beyond the Mat
One should also understand the Lotus posture as something more than merely a shape. On a daily level, sitting in Lotus — even if only for a few minutes — can be a ritual that encourages being grounded. “It calms the brain, sort of slows it down, it’s stress-reducing, and because it’s about imagery, it just gives you that pause in the busyness of the day.
It’s often used as part of meditation or breathing practice by some practitioners, while others simply see it as a reflection of their yoga journey. Either way, Lotus is a reminder that the practice of yoga is not just about being able to touch your toes — it’s about finding both inner stillness and awareness.
Final Thoughts
The Lotus Position is timeless in its representation of Yoga. Hips, knees and ankles need to work in tandem, and you need solid core and spinal muscles to support them. When practised with intent, Lotus confers profound physical benefits – improved posture, flexibility, breathing, as well as mental stillness and spiritual grounding.
If you are still building up to the full look, the process is as important as the end goal. Each hip opener, each seated posture, every mindful breath is also the practice. Then, with time, the body opens, the mind quiets, and something else happens, as Lotus becomes beautiful not just as a shape but as a state.
Our Popular Yoga Teacher Training Courses >> For Students Who Want to Become a Yoga Teacher

200 Hour Yoga Teacher Training in Rishikesh || 300 Hour Yoga Teacher Training in Rishikesh
This article is for general information and is not medical advice. If you have a respiratory or heart condition, are pregnant, or are unsure whether these practices suit you, please speak to your doctor before beginning.

 +91-8433225327,
 Rishikul Yogshala Rishikesh, Narayan Kunj, Jonk Village, Ram Jhula, Swarg Ashram, Rishikesh, Uttarakhand 249304
 By Airway
 By Railway
 By Bus/Cabs